Webwork Action and HTML View
You might say “WebworkAction? That came out of nowhere!” and you are right. I will introduce you to it, since this is one way to provide Pages inside JIRA in a nice way.
You can read about JIRA Webwork Action or Webwork plugin module but you will also understand what is going on after my short introduction.
Introduction
-
Basically Webwork Actions are Controllers (MVC paradigm) that react to certain URLs in JIRA.
-
They handle Authentication (is user logged in?) and Authorisation (has user rights to view page?) easily.
-
They let us define multiple Views (MVC paradigm) for example an Error-View and a Success-View.
-
They provide Template Renderer like Velocity which helps us to inject some variables into the View.
-
They are easily defined with some XML code in the
atlassian-plugin.xmlfile (we will learn later more about that).
Ok now you know enough to get started. Open a terminal and change inside the directory of the plugin.
We will again use the Atlassian SDK to generate the basic files for us. Type the command and choose 31. Webwork Plugin
Choose Plugin Module:
1:  Component Import
2:  Component
3:  Component Tab Panel
...
31: Webwork Plugin
...
34: Workflow Validator
Choose a number (1/2/3.../33/34): 31
Enter Plugin Module Name My Webwork Module: : Kitchen Duty Planning Webwork Module
Show Advanced Setup? (Y/y/N/n) N: : Y
Module Key kitchen-duty-planning-webwork-module: :
Module Description The Kitchen Duty Planning Webwork Module Plugin: :
i18n Name Key kitchen-duty-planning-webwork-module.name: :
i18n Description Key kitchen-duty-planning-webwork-module.description: :
Enter Action Classname MyActionClass: : KitchenDutyPlanningWebworkAction
Enter Package Name io.codeclou.jira.webwork: : io.codeclou.kitchen.duty.webwork
Enter Alias KitchenDutyPlanningWebworkAction: :
Enter View Name success: : kitchen-duty-planning-success
Enter Template Path /templates/.../kitchen-duty-planning-success.vm: : /templates/kitchen-duty-planning-webwork-module/kitchen-duty-planning-success.vm
Add Another View? (Y/y/N/n) N: : N
Add Another Action? (Y/y/N/n) N: : N
[INFO] Adding the following items to the project:
[INFO]   [class: io.codeclou.kitchen.duty.webwork.KitchenDutyPlanningWebworkAction]
[INFO]   [class: ut.io.codeclou.kitchen.duty.webwork.KitchenDutyPlanningWebworkActionTest]
[INFO]   [dependency: org.apache.httpcomponents:httpclient]
[INFO]   [dependency: org.mockito:mockito-all]
[INFO]   [dependency: org.slf4j:slf4j-api]
[INFO]   [module: webwork1]
[INFO]   [resource: kitchen-duty-planning-success.vm]
[INFO]   i18n strings: 2
Add Another Plugin Module? (Y/y/N/n) N: : N
[INFO] ------------------------------------------------------------------------
[INFO] BUILD SUCCESS
[INFO] ------------------------------------------------------------------------
[INFO] Total time: 10:53 min
[INFO] Finished at: 2015-12-16T14:12:07+01:00
[INFO] Final Memory: 29M/309M
[INFO] ------------------------------------------------------------------------
After we have done that we see that a lot of code and files have been generated. You can see all changes in this GitHub Commit 162ed70.
What is important for us are the following changes:
-
atlassian-plugin.xmlcontains now the webwork definiton of our Action and View.src/main/resources/.../atlassian-plugin.xml<webwork1 key="kitchen-duty-planning-webwork-module" name="Kitchen Duty Planning Webwork Module" i18n-name-key="kitchen-duty-planning-webwork-module.name"> <description key="kitchen-duty-planning-webwork-module.description">The Kitchen Duty Planning Webwork Module Plugin</description> <actions> <action name="io.codeclou.kitchen.duty.webwork.KitchenDutyPlanningWebworkAction" alias="KitchenDutyPlanningWebworkAction"> <view name="kitchen-duty-planning-success">/templates/kitchen-duty-planning-webwork-module/kitchen-duty-planning-success.vm</view> </action> </actions> </webwork1> -
pom.xmlcontains now needed dependencies.pom.xml<dependency> <groupId>org.apache.httpcomponents</groupId> <artifactId>httpclient</artifactId> <version>4.1.1</version> <scope>test</scope> </dependency> <dependency> <groupId>org.slf4j</groupId> <artifactId>slf4j-api</artifactId> <version>1.6.6</version> <scope>provided</scope> </dependency> <dependency> <groupId>org.mockito</groupId> <artifactId>mockito-all</artifactId> <version>1.8.5</version> <scope>test</scope> </dependency>
You should be able to open the KitchenDutyPlanningWebworkAction in IntelliJ now.

Now we change the execute Method to work with our view:
@Override
public String execute() throws Exception {
   return "kitchen-duty-planning-success";
}
Now our view will be called when we browse to the Webactions URL which is simply http://server/jira/secure/[WebWorkAlias].jspa in our case http://server/jira/secure/KitchenDutyPlanningWebworkAction.jspa.
We will now start JIRA wich will have our Plugin installed with the following command. (Go get another coffee, this will take some time to download dependencies)
Now browse to http://localhost:2990/jira/secure/KitchenDutyPlanningWebworkAction.jspa and you should see:
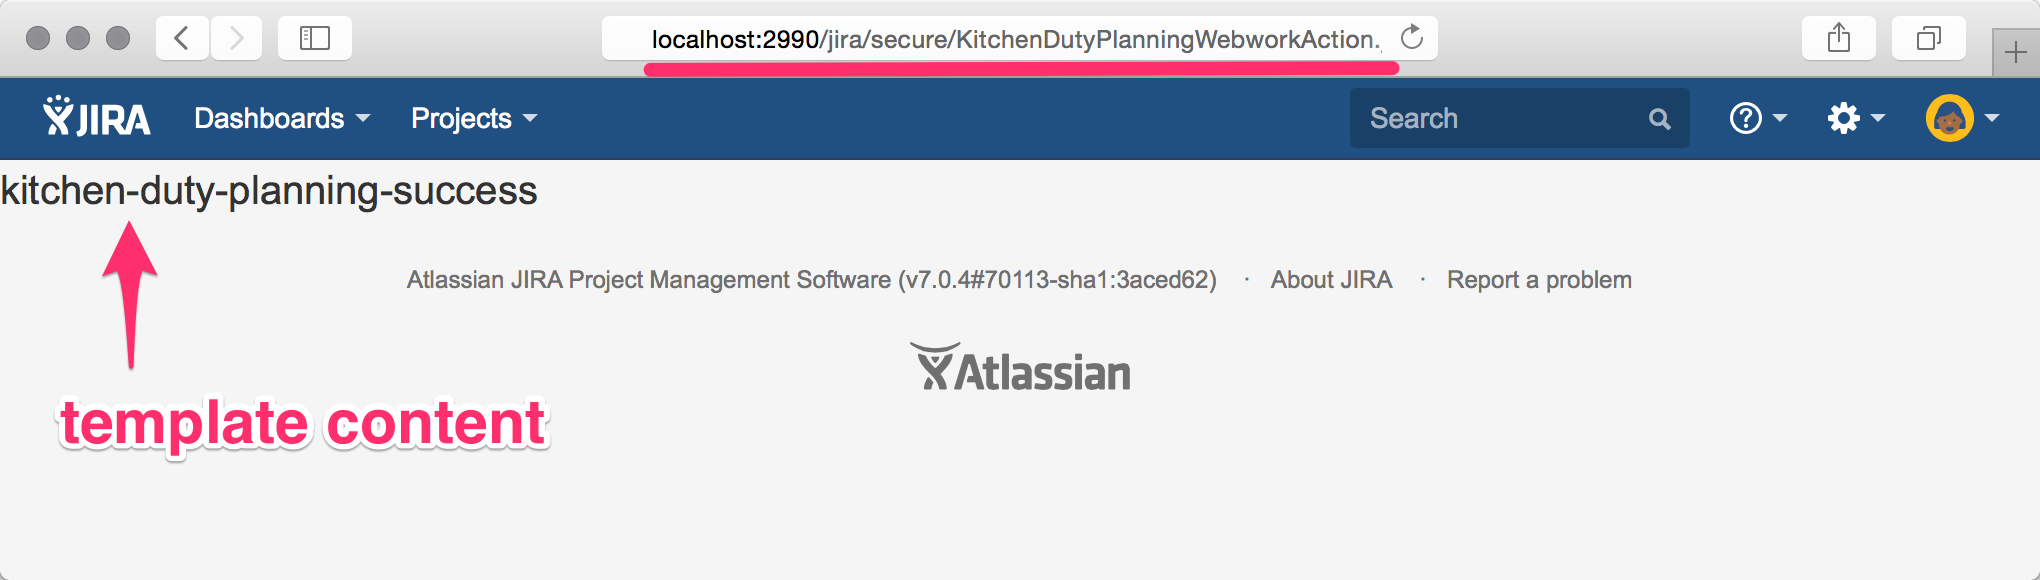
Alright. That is working but it does not look very nice. We will improve the look and functionality step by step.
What do we need to improve the UX?
- We want to have the usual JIRA administrator page layout
- We need a sidebar navigation for links to our pages
- Of course we need a content section
- i18n would be nice so that we can later easily make our plugin multi-language
- The planning page should only be accessible for administrators
1. JIRA administrator page layout (Page Decorator)
We know what we need and I will introduce you to the Atlassian Components which will do the job.
Edit the kitchen-duty-planning-success.vm which resides in src/main/resources/templates/kitchen-duty-planning-webwork-module/ like this.
<html>
<head>
    <title>Planning Page - Kitchen Duty Plugin</title>
    <meta name="decorator" content="atl.admin">
</head>
<body>
<h1>Kitchen Duty Plugin - Planning Page</h1>

<p>Now it looks nice :)</p>
</body>
</html>
The important thing is the
Page Decorator
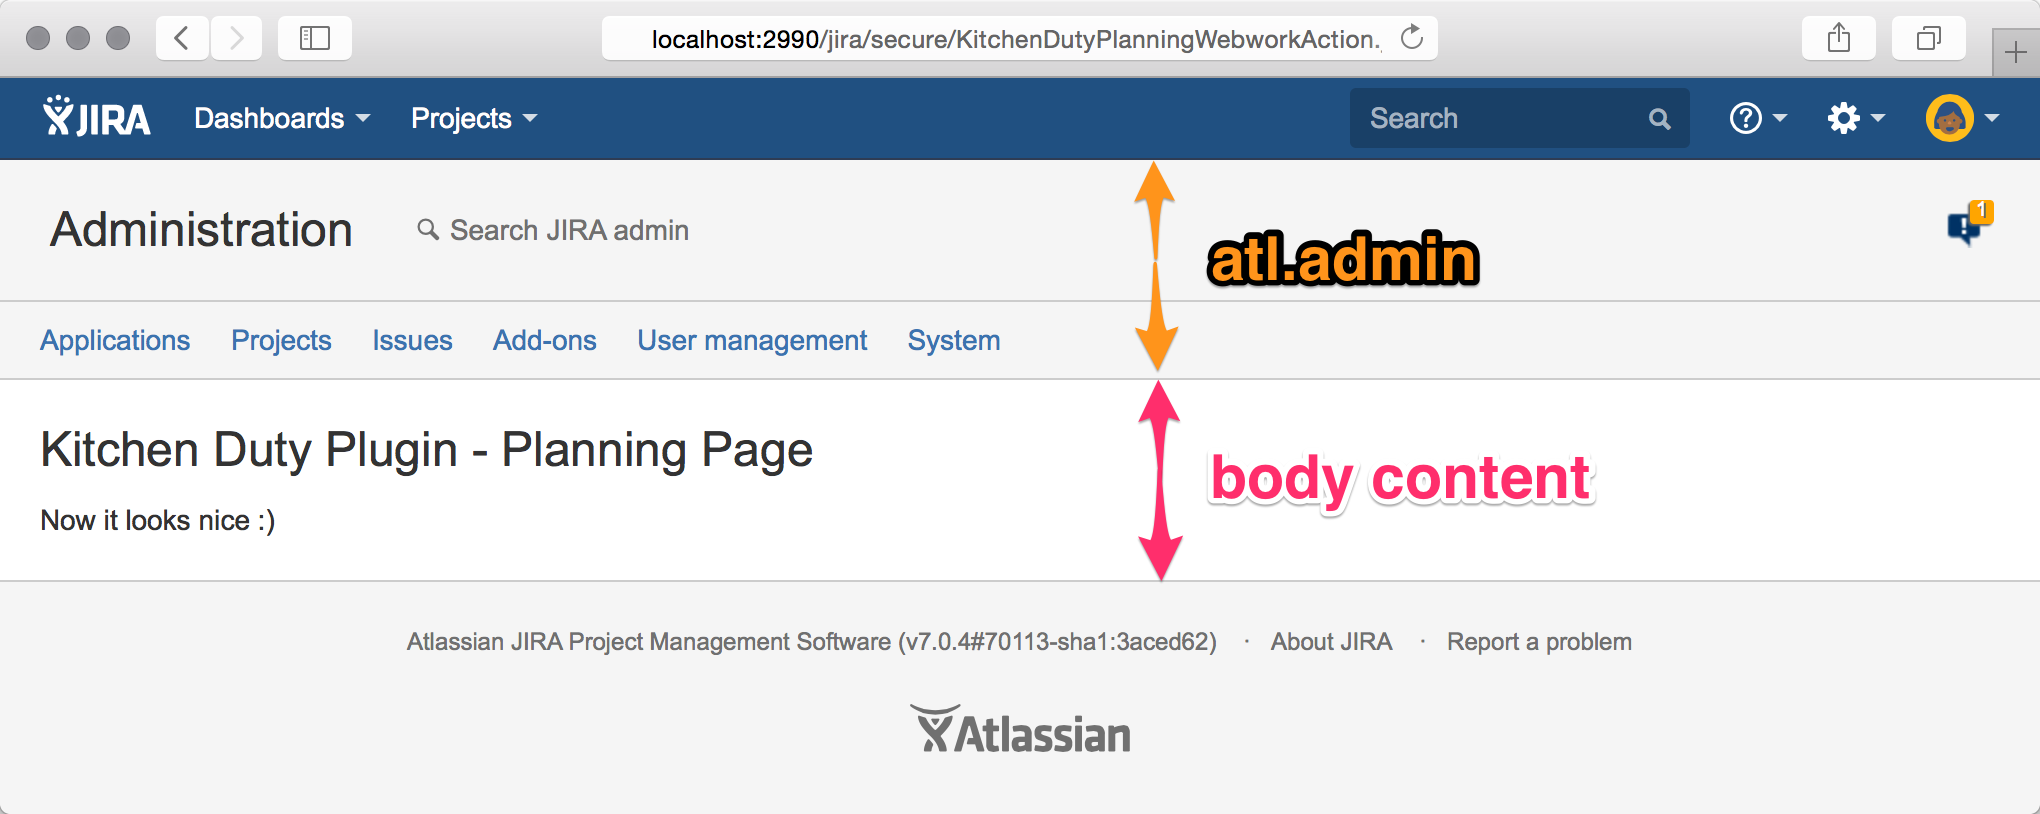
part which says <meta name="decorator" content="atl.admin">.
So what is that about? This statement tells the Page Decorator to render the layout for atl.admin
which is basically the administrator layout.
After you have saved the changes run atlas-run again your shell to start JIRA and browse to the Planning Page. It should look like this now.
If you had atlas-run still running and do not see your changes, try opening a second shell and type atlas-cli wait for the prompt, type pi and press enter. Now your plugin is force-rebuild. You can read more about that later on in the section about faster development.
2. Sidebar Navigation (Web Section / Item)
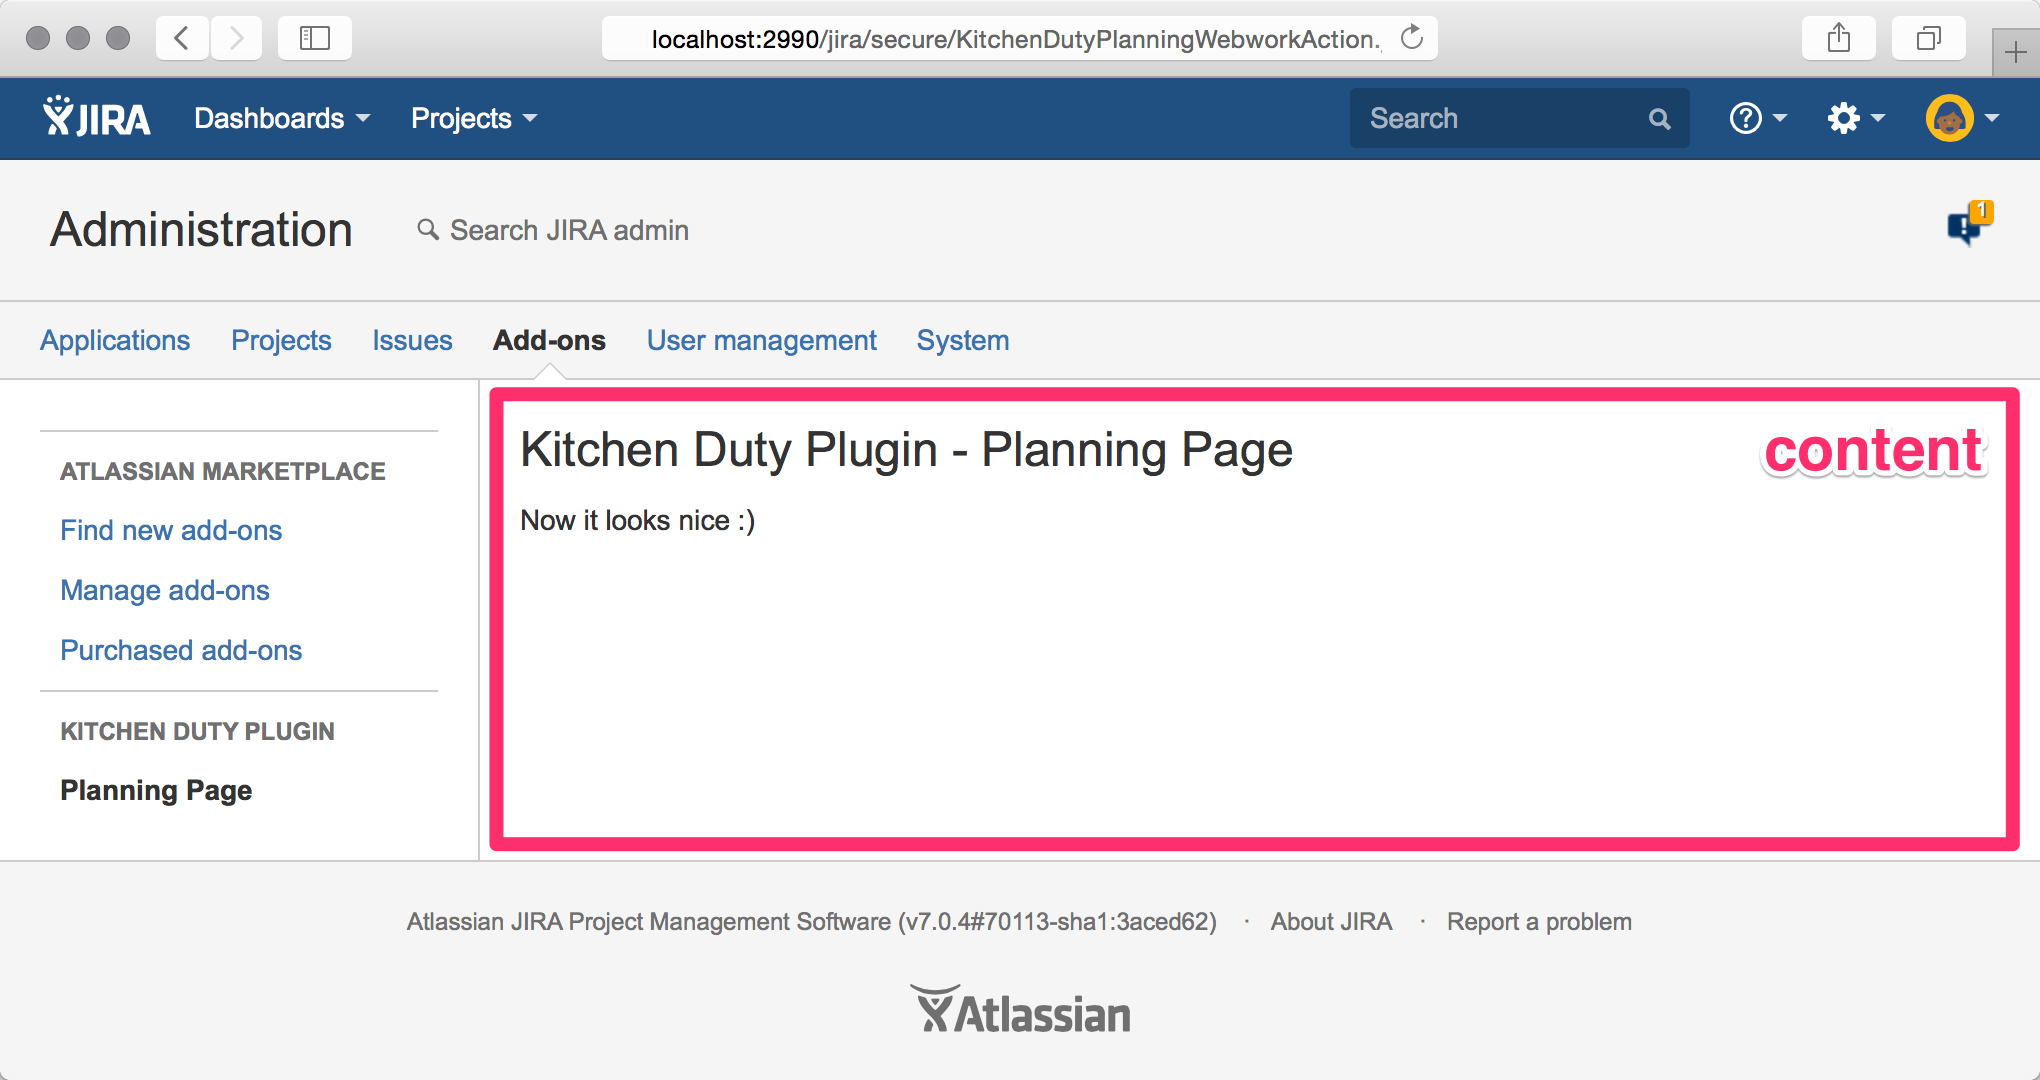
We could just simply fiddle our own sidebar together but that is not the professional way. Do do it the professional way we will use the Web Section Plugin Module and the Web Item Plugin Module to hook into the JIRA Sidebar which renders for every administrator tab section, so that it will look like this.

You might need another coffee because here comes the code for the atlassian-plugin.xml which resides in src/main/resources/
<atlassian-plugin>
...
  <web-section key="admin_kitchen_duty_planning_section"
               name="admin_kitchen_duty_planning_section"
               location="admin_plugins_menu"
               weight="20"
               i18n-name-key="kitchen-duty-plugin.admin.planning.page.web.section.name">
    <label key="kitchen-duty-plugin.admin.planning.page.web.section.name" />
  </web-section>

  <web-item key="admin_kitchen_duty_planning_webitem"
            name="admin_kitchen_duty_planning_webitem"
            section="admin_plugins_menu/admin_kitchen_duty_planning_section"
            weight="15"
            i18n-name-key="kitchen-duty-plugin.admin.planning.page.web.item.name">
    <label key="kitchen-duty-plugin.admin.planning.page.web.item.name" />
    <link linkId="admin_kitchen_duty_planning_webitem_link">/secure/KitchenDutyPlanningWebworkAction.jspa</link>
  </web-item>

</atlassian-plugin>
The web-section is the "container" which hold web-items and has a headline. Web-items are basically the navigation links and have a name and URL.
So what is happening here?
-
The
web-sectiondoes need a unique key and name. The weight defines the order of the section relative to sections of other addons. The location defines the page or tab under which the web-section should be injected; we use the Addons Tab. The<label keyis some OSGi stuff I think, just name the key as the i18n-name-key. Lastly thei18n-name-keyis the identifier to thekitchen-duty-plugin.propertieslanguage file which contains the actual translations. The
web-itemhas the same attributes as the web-section. But you need to specify asectionwhich points to our web-section name. The<linkobject contains the actual URL to our page.
Since we heard about i18n now we need to define our values in the language file kitchen-duty-plugin.properties.
# websection/webitems
kitchen-duty-plugin.admin.planning.page.web.section.name = Kitchen Duty Plugin
kitchen-duty-plugin.admin.planning.page.web.item.name = Planning Page
Alright this was a little complicated but now we have a nice sidebar navigation link.
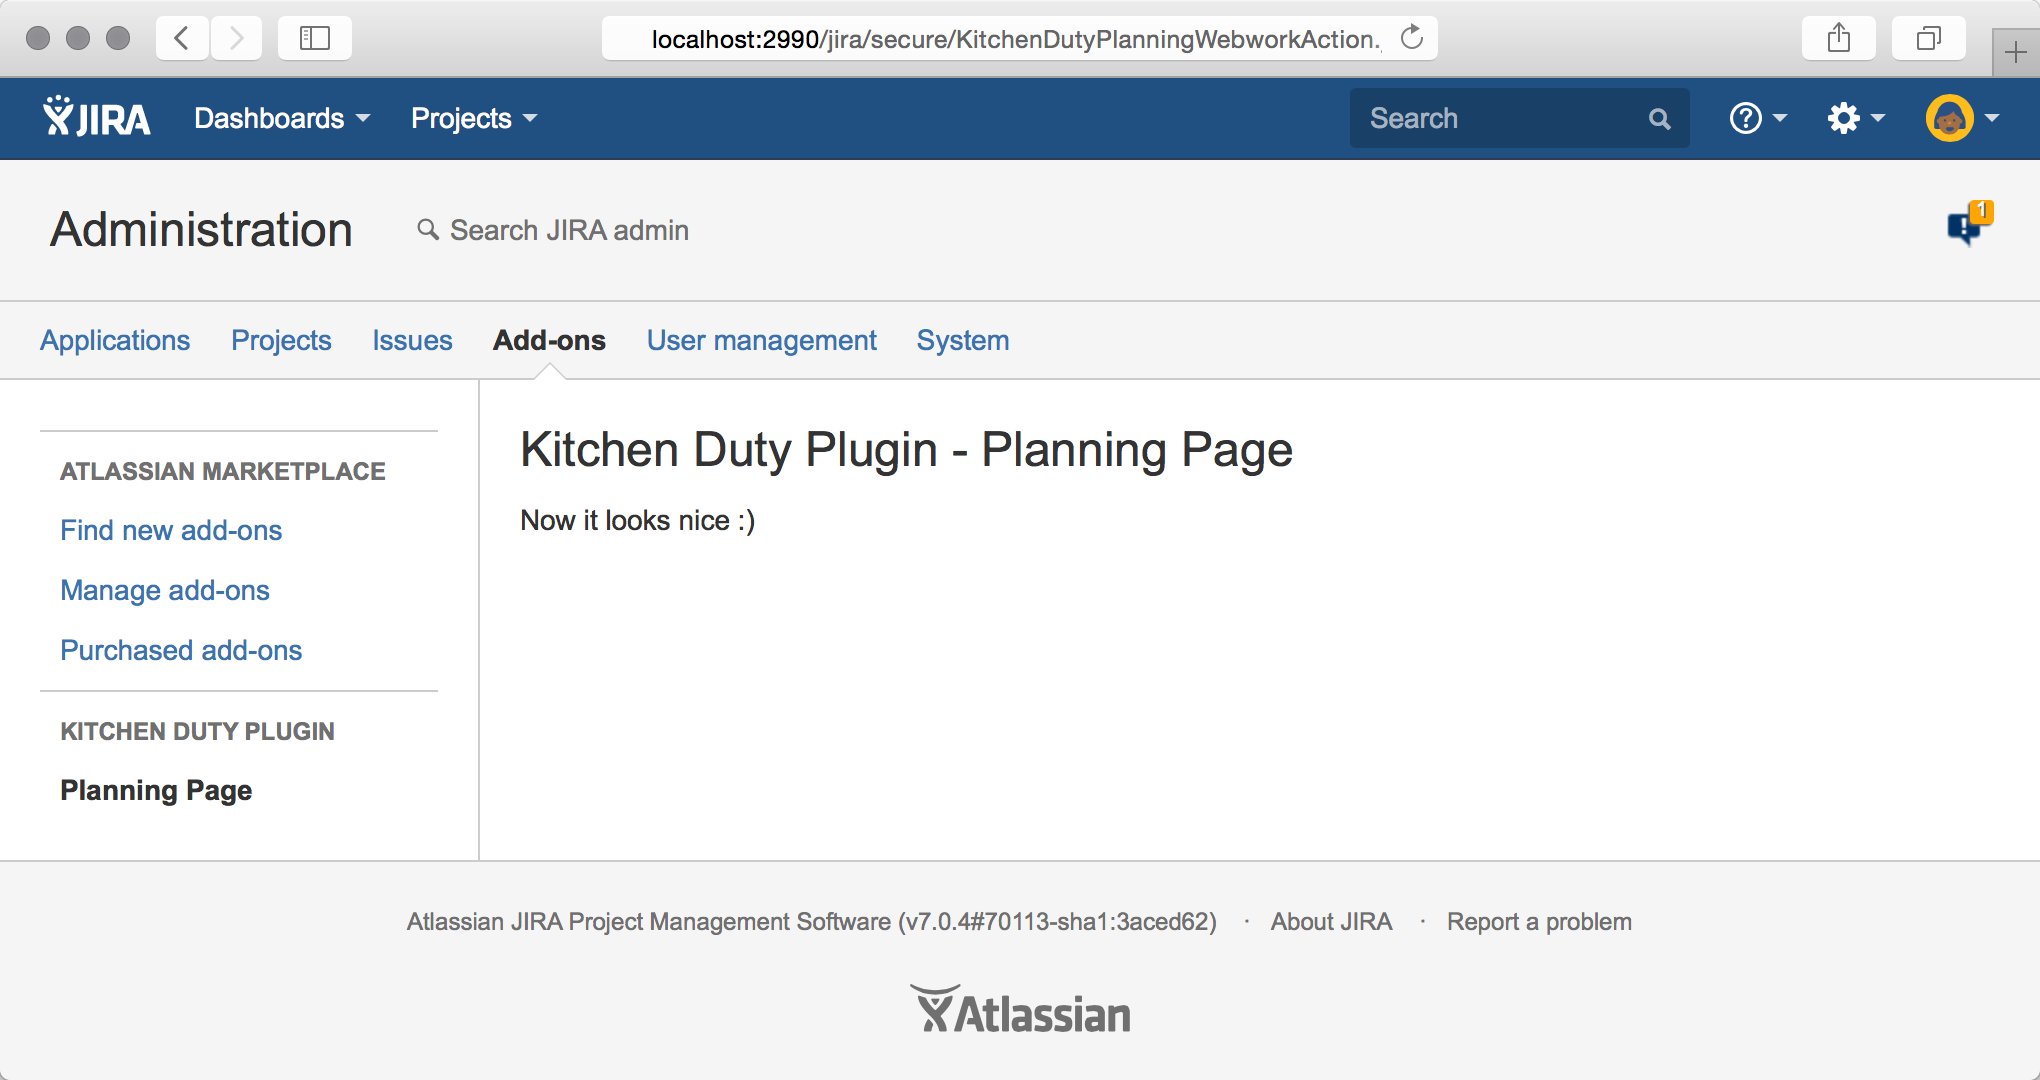
3. Content Section (AUI Layout)
Ok this is a no-brainer since you already saw the content section. But to be consistent here is the screenshot ;)
If you want to be the a-student you can read about AUI Layout and play around a little. We will use that later to further style our pages.
4. Internationalization (i18n / Velocity)
You already saw some i18n for web-section/item names. Now we want to i18n-ize our html template.
You might have seen the file-ending .vm already. That means the
kitchen-duty-planning-success.vm is an Apache Velocity template.
Some might wonder now "Didn't the ancient greek use velocity?! Is it really still around?". Yes it is and I think it does a great job.
So let's get to action, we will change our html code using i18n.getText("i18n.key") which is a velocity helper to render the i18n value for a given key.
<html>
<head>
    <title>$i18n.getText("kitchen-duty-plugin.admin.planning.page.title")</title>
    <meta name="decorator" content="atl.admin">
</head>
<body>
<h1>$i18n.getText("kitchen-duty-plugin.admin.planning.page.headline")</h1>

<p>Now it looks nice :)</p>
</body>
</html>
Now we need to add the translations to the kitchen-duty-plugin.properties file and we are done internationalising our page.
# kitchen-duty-planning-success.vm
kitchen-duty-plugin.admin.planning.page.headline = Kitchen Duty Plugin - Planning Page
kitchen-duty-plugin.admin.planning.page.title = Planning Page - Kitchen Duty Plugin
5. Admin only Authorization (Webwork Action)
We are using a Webwork Action for our planning page and we can simply set roles-required="admin" in the
atlassian-plugin.xml to enforce administrator only authorization.
<webwork1 key="kitchen-duty-planning-webwork-module"
          ...
          roles-required="admin">
If you log out of JIRA now and browse again to the planning page you will see the administrator login form. When logging in as admin (password admin) you should be redirected to the planning page.
The graphic shows marked green which components we implemented in this section.